Configure Raspberry Pi 3 as an Access Point
In this tutorial, I will explain a very straightforward way to use Raspberry Pi 3 as an access point. This tutorial is purely educational and interesting for anyone who wants to have full control over the network and traffic. Using an open system like Linux allows users to modify their custom AP behavior as they please. What do we need to achieve this?
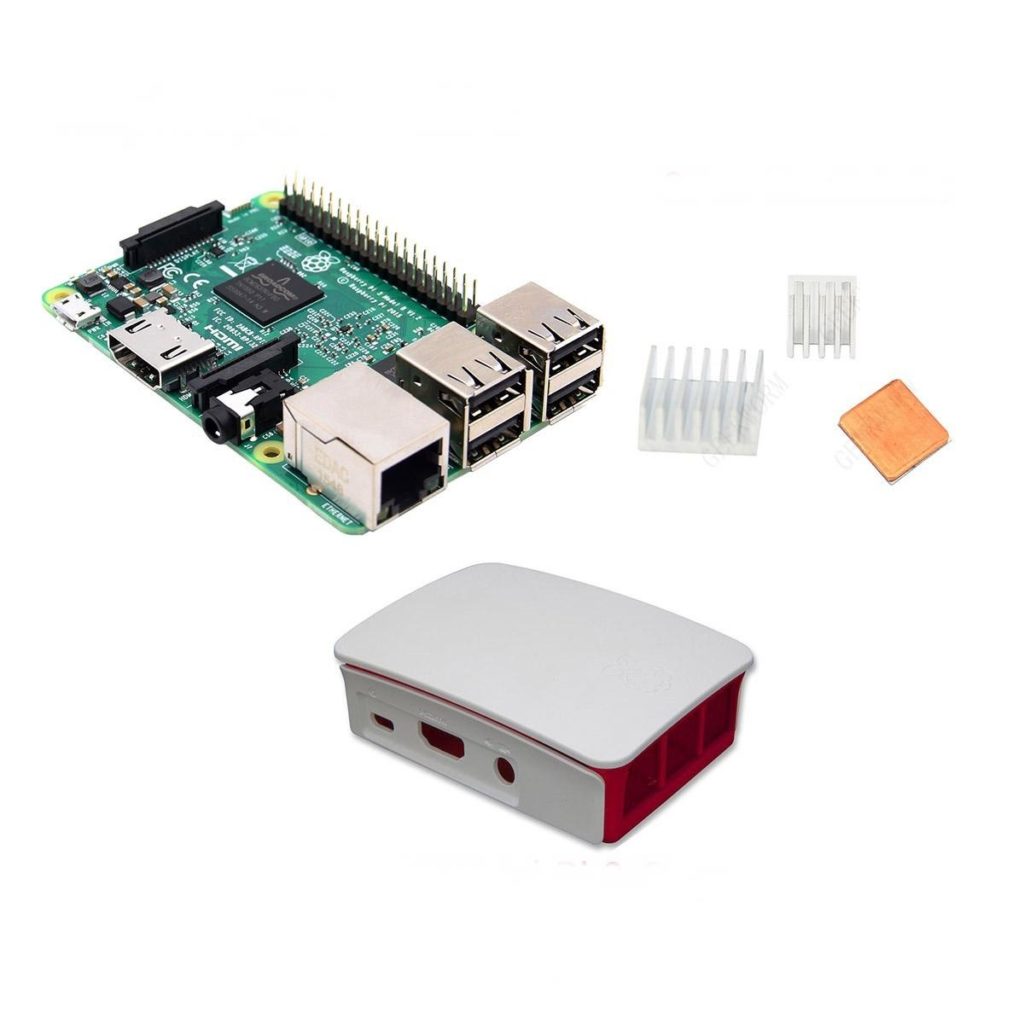
- 1 Raspberry Pi 3
- 1 microSD card of at least 8 GB, preferably 32GB.

Installation of Necessary Tools
The project is straightforward, so to achieve our goal, we only need to install two packages:
- HostAPD (Host Access Point Daemon) is software for managing the wireless interface and also an authentication server.
- DNSMasq is a DHCP server that also provides DNS caching services.
Begin the procedure by connecting to the raspberry via terminal, for example, via ssh or directly in the console, then proceed with the installation of the packages by executing the command:
sudo apt install dnsmasq hostapd
You should see something like this:
pi@raspberrypi:~ $ sudo apt install dnsmasq hostapd
Lettura elenco dei pacchetti... Fatto
Generazione albero delle dipendenze
Lettura informazioni sullo stato... Fatto
I seguenti pacchetti aggiuntivi saranno inoltre installati:
  dns-root-data dnsmasq-base
I seguenti pacchetti NUOVI saranno installati:
  dns-root-data dnsmasq dnsmasq-base hostapd
0 aggiornati, 4 installati, 0 da rimuovere e 1 non aggiornati.
È necessario scaricare 400 kB/1.052 kB di archivi.
Dopo quest'operazione, verranno occupati 2.666 kB di spazio su disco.
Continuare? [S/n] S
Scaricamento di:1 http://archive.raspberrypi.org/debian buster/main armhf dnsmasq-base armhf 2.80-1+rpt1 [400 kB]
Recuperati 400 kB in 1s (712 kB/s)
Selezionato il pacchetto hostapd non precedentemente selezionato.
(Lettura del database... 158415 file e directory attualmente installati.)
Preparativi per estrarre .../hostapd_2%3a2.7+git20190128+0c1e29f-6+deb10u1_armhf.deb...
Estrazione di hostapd (2:2.7+git20190128+0c1e29f-6+deb10u1)...
Selezionato il pacchetto dns-root-data non precedentemente selezionato.
Preparativi per estrarre .../dns-root-data_2019031302_all.deb...
Estrazione di dns-root-data (2019031302)...
Selezionato il pacchetto dnsmasq-base non precedentemente selezionato.
Preparativi per estrarre .../dnsmasq-base_2.80-1+rpt1_armhf.deb...
Estrazione di dnsmasq-base (2.80-1+rpt1)...
Selezionato il pacchetto dnsmasq non precedentemente selezionato.
Preparativi per estrarre .../dnsmasq_2.80-1+rpt1_all.deb...
Estrazione di dnsmasq (2.80-1+rpt1)...
Configurazione di dnsmasq-base (2.80-1+rpt1)...
Configurazione di dns-root-data (2019031302)...
Configurazione di dnsmasq (2.80-1+rpt1)...
Created symlink /etc/systemd/system/multi-user.target.wants/dnsmasq.service → /lib/systemd/system/dnsmasq.service.
Configurazione di hostapd (2:2.7+git20190128+0c1e29f-6+deb10u1)...
Created symlink /etc/systemd/system/multi-user.target.wants/hostapd.service → /lib/systemd/system/hostapd.service.
Job for hostapd.service failed because the control process exited with error code.
See "systemctl status hostapd.service" and "journalctl -xe" for details.
Created symlink /etc/systemd/system/hostapd.service → /dev/null.
Elaborazione dei trigger per systemd (241-7~deb10u1+rpi1)...
Elaborazione dei trigger per man-db (2.8.5-2)...
Elaborazione dei trigger per dbus (1.12.16-1)...
pi@raspberrypi:~ $
After the software installation, we will disable the services we’ve installed until the configuration files are appropriately modified. Execute the following commands:
sudo systemctl stop dnsmasq
sudo systemctl stop hostapd
Usage Scenario
For the configuration phase, we assume the simplest usage scenario. It consists of an access point providing connectivity to a client network with addressing 192.168.3.0/24. We will assign the static address 192.168.3.1 to the raspberry, which often conventionally identifies the gateway’s IP. For the SSID (name of the wireless network), we will use: TestReteWifi.

Configuring a Static IP
To set up a static IP address for the wireless interface, first, identify its name among the available ones. Raspberry Pi 3 has a built-in wireless interface, which on Linux is typically identified as wlan0. However, to be sure, especially if you’re also using Wi-Fi dongles, execute the following command to ensure you’re using the correct interface identifier:
sudo ifconfig -a
You should see something like this:
pi@raspberrypi:~ $ sudo ifconfig -a

eth0: flags=4099<UP,BROADCAST,MULTICAST>  mtu 1500
        ether b8:27:eb:5c:a7:01  txqueuelen 1000  (Ethernet)
        RX packets 0  bytes 0 (0.0 B)
        RX errors 0  dropped 0  overruns 0  frame 0
        TX packets 0  bytes 0 (0.0 B)
        TX errors 0  dropped 0 overruns 0  carrier 0  collisions 0
lo: flags=73<UP,LOOPBACK,RUNNING>  mtu 65536
        inet 127.0.0.1  netmask 255.0.0.0
        inet6 ::1  prefixlen 128  scopeid 0x10<host>
        loop  txqueuelen 1000  (Local Loopback)
        RX packets 0  bytes 0 (0.0 B)
        RX errors 0  dropped 0  overruns 0  frame 0
        TX packets 0  bytes 0 (0.0 B)
        TX errors 0  dropped 0 overruns 0  carrier 0  collisions 0
wlan0: flags=4163<UP,BROADCAST,RUNNING,MULTICAST>  mtu 1500
        inet 192.168.1.50  netmask 255.255.255.0  broadcast 192.168.1.255
        inet6 fe80::f16f:5c00:be2b:c88f  prefixlen 64  scopeid 0x20<link>
        ether b8:27:eb:09:f2:54  txqueuelen 1000  (Ethernet)
        RX packets 13238  bytes 4959004 (4.7 MiB)
        RX errors 0  dropped 0  overruns 0  frame 0
        TX packets 888  bytes 114046 (111.3 KiB)
        TX errors 0  dropped 0 overruns 0  carrier 0  collisions 0
As expected, in my case, the interface of interest is wlan0.
To configure the static IP address for the raspberry’s interface, we will modify the dhcpcd configuration file.
Caution! If you’re already working via Wi-Fi, when you modify the IP of wlan0, you will lose the network connection. Therefore, I suggest connecting the raspberry via an ethernet cable to avoid connectivity issues at this stage.
Now, you just need to edit the dhcpcd.conf file by executing:
sudo vi /etc/dhcpcd.conf
or
sudo nano /etc/dhcpcd.conf
depending on your preference, and append the following configuration:
interface wlan0
static ip_address=192.168.3.1/24
nohook wpa_supplicant
Configuring the DHCP Server (dnsmasq)
The DHCP service, as previously mentioned, will be provided by dnsmasq. By default, the configuration contains a lot of information, so for simplicity, we’ll write a new file from scratch. But first, backup the original file. Execute the following commands to back up and edit the new configuration file:
sudo mv /etc/dnsmasq.conf /etc/dnsmasq.conf.orig
sudo nano /etc/dnsmasq.conf
Insert the following information into the dnsmasq.conf file and save:
interface=wlan0      # Use the required wireless interface - usually wlan0
dhcp-range=192.168.3.2,192.168.3.20,255.255.255.0,24h
Restart the dnsmasq service:
sudo systemctl start dnsmasq
The DHCP server is now ready to provide IP addresses to clients within the range of 192.168.3.2 to 192.168.3.20.
Configuration of hostapd
To complete the setup, edit the file /etc/hostapd/hostapd.conf and add the necessary parameters, starting from an empty file:
sudo nano /etc/hostapd/hostapd.conf
The configuration we’ll use assumes:
- Channel 7 as the frequency band;
- SSID: TestReteWifi
- Password: PasswordDiReteWifi
Remember that the passphrase must be between 8 and 64 characters in length, in line with the specifications imposed by the chosen security protocol, wpa2.
Below is a small legend that allows you to appropriately choose the frequency band of the AP that best suits your needs. In our example, we will use the configuration hw_mode=g, but you can change it according to your requirements:
- a = IEEE 802.11a (5 GHz)
- b = IEEE 802.11b (2.4 GHz)
- g = IEEE 802.11g (2.4 GHz)
- ad = IEEE 802.11ad (60 GHz)
Here’s the configuration to copy into the /etc/hostapd/hostapd.conf file:
interface=wlan0
driver=nl80211
ssid=TestReteWifi
hw_mode=g
channel=7
wmm_enabled=0
macaddr_acl=0
auth_algs=1
ignore_broadcast_ssid=0
wpa=2
wpa_passphrase=PasswordDiReteWifi
wpa_key_mgmt=WPA-PSK
wpa_pairwise=TKIP
rsn_pairwise=CCMP
To make hostapd use this configuration file, we need to edit the file /etc/default/hostapd:
sudo nano /etc/default/hostapd
Locate the line #DAEMON_CONF=”” and replace it with:
DAEMON_CONF="/etc/hostapd/hostapd.conf"
Configuration of Routing and Masquerade (NAT)
For the Raspberry Pi to act as a gateway and route client traffic to the external network, we need to enable IP forwarding. Execute:
sudo sh -c "echo 1 > /proc/sys/net/ipv4/ip_forward"
To ensure this configuration is maintained even after a reboot, edit the sysctl.conf file:
sudo nano /etc/sysctl.conf
Locate the line:
#net.ipv4.ip_forward=1
and uncomment it by removing the “#” at the beginning.
The last step involves setting up the masquerade, which will allow clients to access external networks through the Raspberry Pi’s IP address. Execute:
sudo iptables -t nat -A POSTROUTING -o eth0 -j MASQUERADE
To ensure this rule remains active after a reboot, we need to save it and then restore it at boot time:
sudo sh -c "iptables-save > /etc/iptables.ipv4.nat"
echo 'iptables-restore < /etc/iptables.ipv4.nat' | sudo tee -a /etc/rc.local
Our Raspberry Pi is finally an access point!

I am passionate about technology and the many nuances of the IT world. Since my early university years, I have participated in significant Internet-related projects. Over the years, I have been involved in the startup, development, and management of several companies. In the early stages of my career, I worked as a consultant in the Italian IT sector, actively participating in national and international projects for companies such as Ericsson, Telecom, Tin.it, Accenture, Tiscali, and CNR. Since 2010, I have been involved in startups through one of my companies, Techintouch S.r.l. Thanks to the collaboration with Digital Magics SpA, of which I am a partner in Campania, I support and accelerate local businesses.
Currently, I hold the positions of:
CTO at MareGroup
CTO at Innoida
Co-CEO at Techintouch s.r.l.
Board member at StepFund GP SA
A manager and entrepreneur since 2000, I have been:
CEO and founder of Eclettica S.r.l., a company specializing in software development and System Integration
Partner for Campania at Digital Magics S.p.A.
CTO and co-founder of Nexsoft S.p.A, a company specializing in IT service consulting and System Integration solution development
CTO of ITsys S.r.l., a company specializing in IT system management, where I actively participated in the startup phase.
I have always been a dreamer, curious about new things, and in search of “new worlds to explore.”

Comments